You can store all types of files on Google drive & share them with anyone by just sharing a link.
Google Drive also offers an option to choose what anyone with the link can do; it’s on you whether you allow them only to view & comment or enable them to edit the file as they want.
In all three options, you are not going to protect your files completely, anyone with the link has access to the data, no matter whether they can view it or edit it, this can be misused.
But what if you can password protect your files or folder so that only the authentic person with a password can access it.
There is no direct way to password protect your file. Here in this article, we are going to share the complete method with step by step instructions on how you can password protect your files or folder.
Not just about files or folders, you can share anything stored on your drive with password protection.
As we all know, there is no direct way to password protect google drive folder, but you can do it easily with Google form, let’s understand how?
Instructions To Password Protect Google Drive Folder
To password protect your folder, you first have to create a folder in Google drive & get the shareable link of the folder. Then after that, you have to create Google form for password protection.
1. Get The Shareable Link of The Folder From Google Drive.
Step 1: Login in your Google Drive account
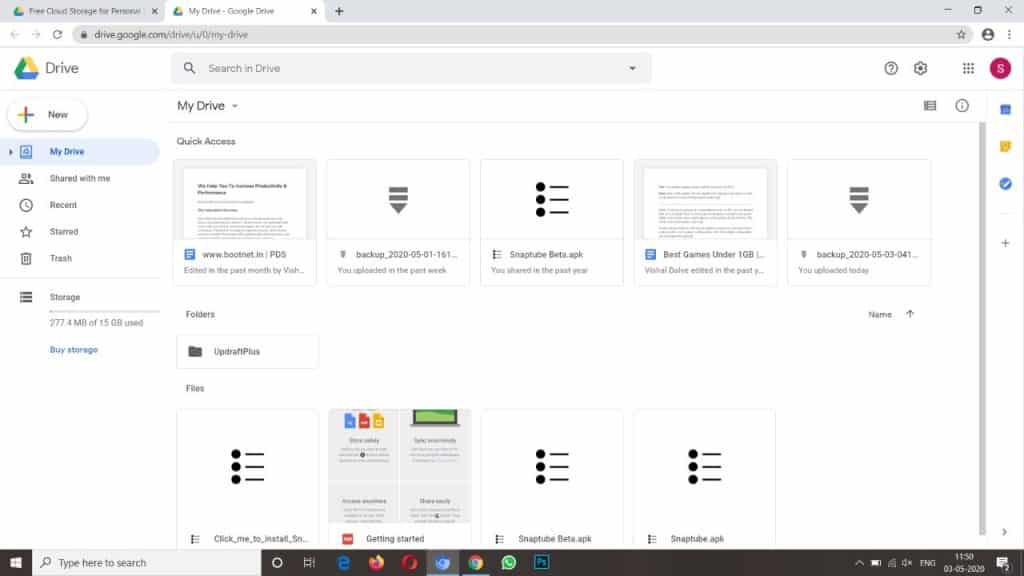
Step 2: Select the file you want to share by protecting it with a password
Step 3: Right-click on file >> Click on share >> Select what anyone with the link can do with the file (View, Comment & Edit) >> Copy link.
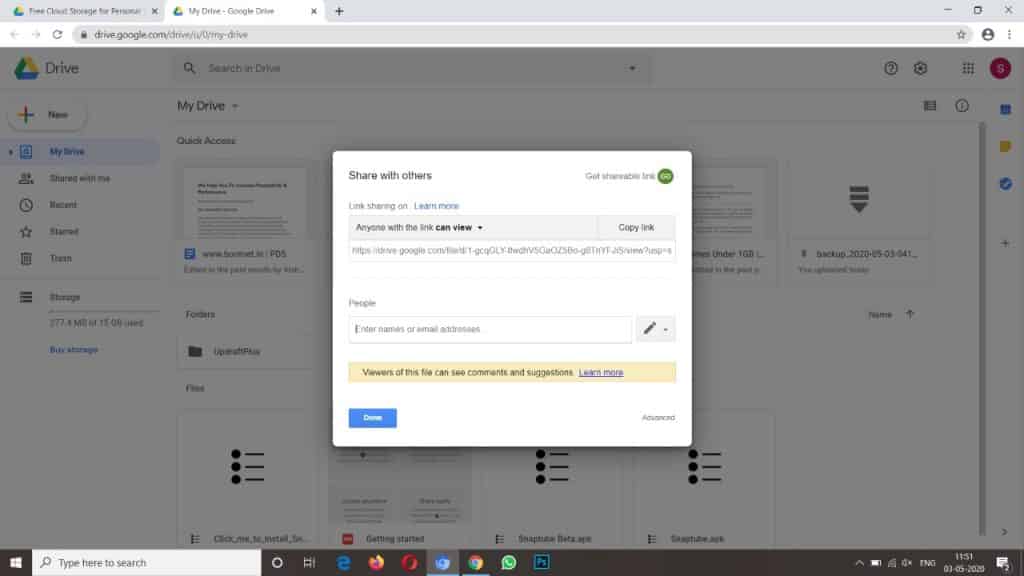
Once you have done with it, your work with Google Drive is over. Now we have to create Google From
2. Create Google Form For Password Protection
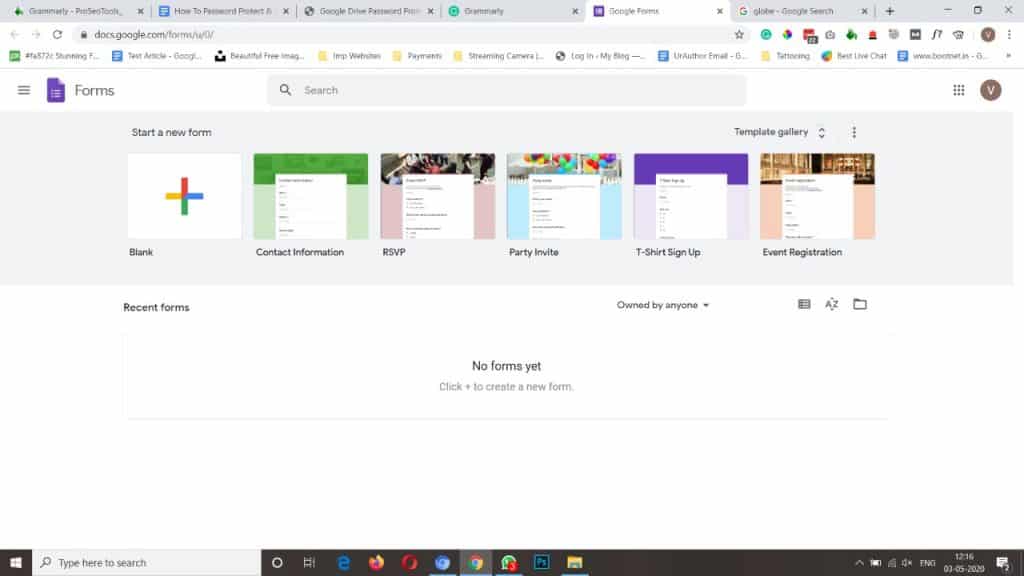
Step 1: Go to the Google Forms, then click on the blank form to create a new one.
Step 2: Give a proper Name & Description for form (Optional)
Step 3: Now configure the form field, first enter the sentence as “Enter the Password…” in the field of “Untitled Question“. Make sure that from says “Short Answer Text” in the answer field, as shown in the image
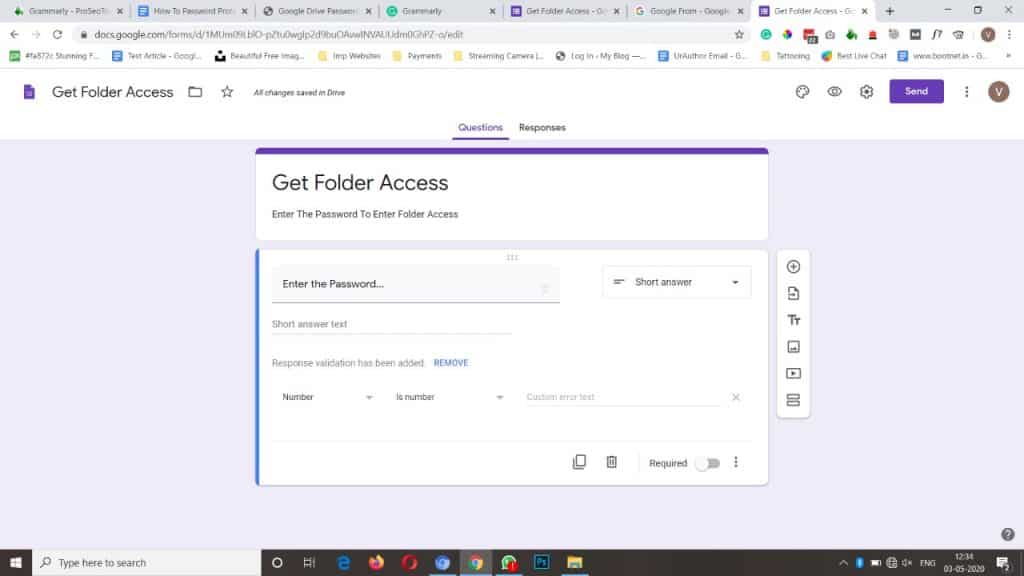
Step 4: At the end of the form, Below the Response validation has been added, select “Text” from drop-down & in another drop-down, select “Contains.”
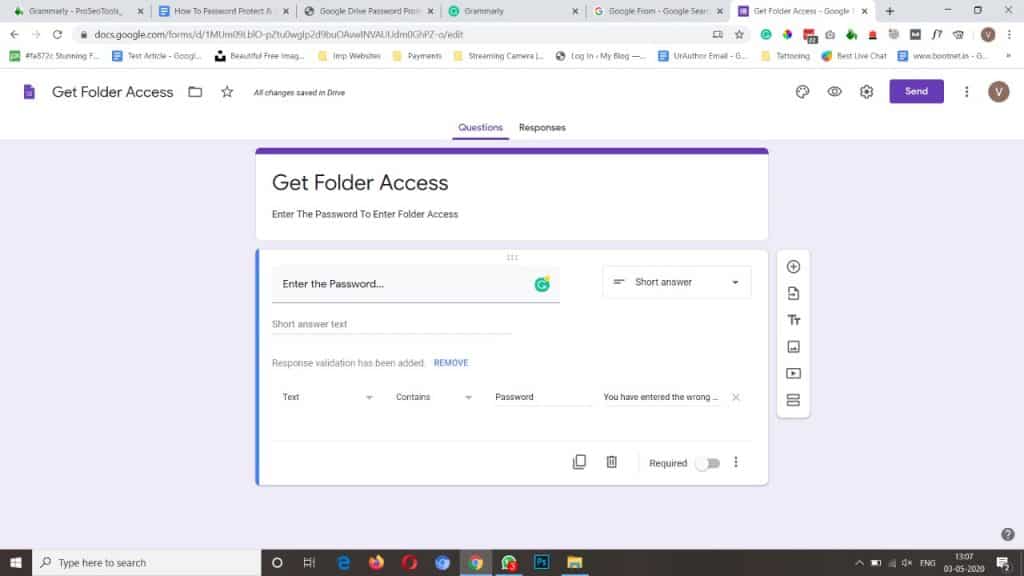
Step 5: You see the blank text field next to the drop-down, enter the “Password” here & in another text field next to it, enter the message you want to show when anyone enters the wrong password, it can be “You have entered the wrong password, try again.”
Step 6: Turn on the Required option at the end of the form.
Step 7: At the top of the screen, click on the Setting button, then go to the Presentation.
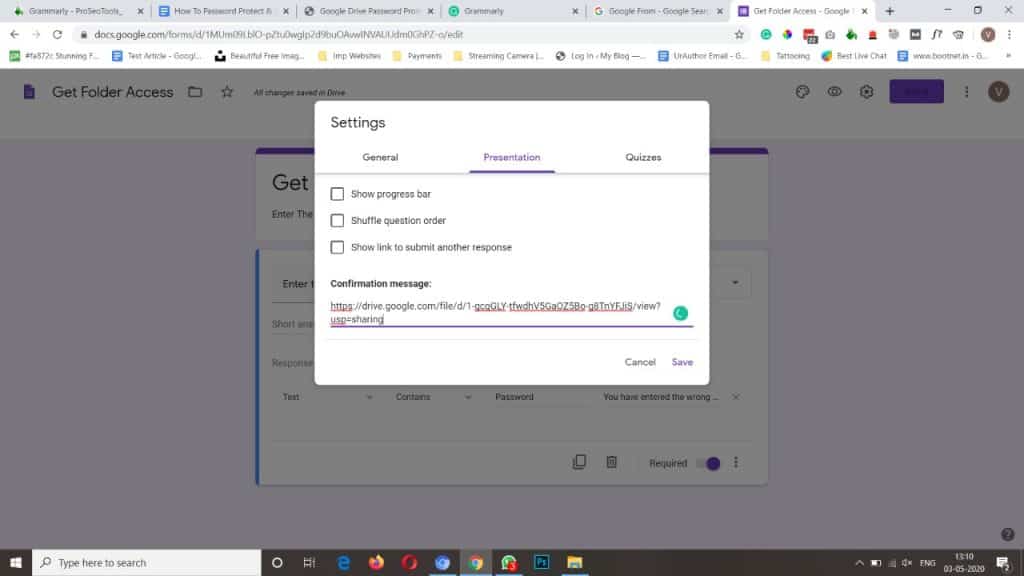
Step 8: In the field of Confirmation Message, enter the URL of Google Drive file you want to protect with password & click on Save.
Step 9: Click on Send, the new windows will pop from here you can send from, copy form link or embed code.
You have successfully added the password protection for your file, copy the form link & share it with anyone with the password, only the person with the right password can access the folder.
Also Read Windows defender vs Avast
Final Words
That’s how you can password protect Google drive folder or files. We hope this article on how you can password protect Google drive folder or file is helpful for you. If the article is useful for you in any manner, then do share it on social media, Stay connected with us for future updates.
1 thought on “Steps to Password Protect Google Drive Folder and Files | Latest Method”